How to use RLS?
You can set RLS for each entity by going to the “Entity” section, and clicking on the “Security” button.Adding Security Rules
When you want to control access to an entity, you can add a security rule using the “Security” button in the Entity section. This opens the Add Security Rule dialog: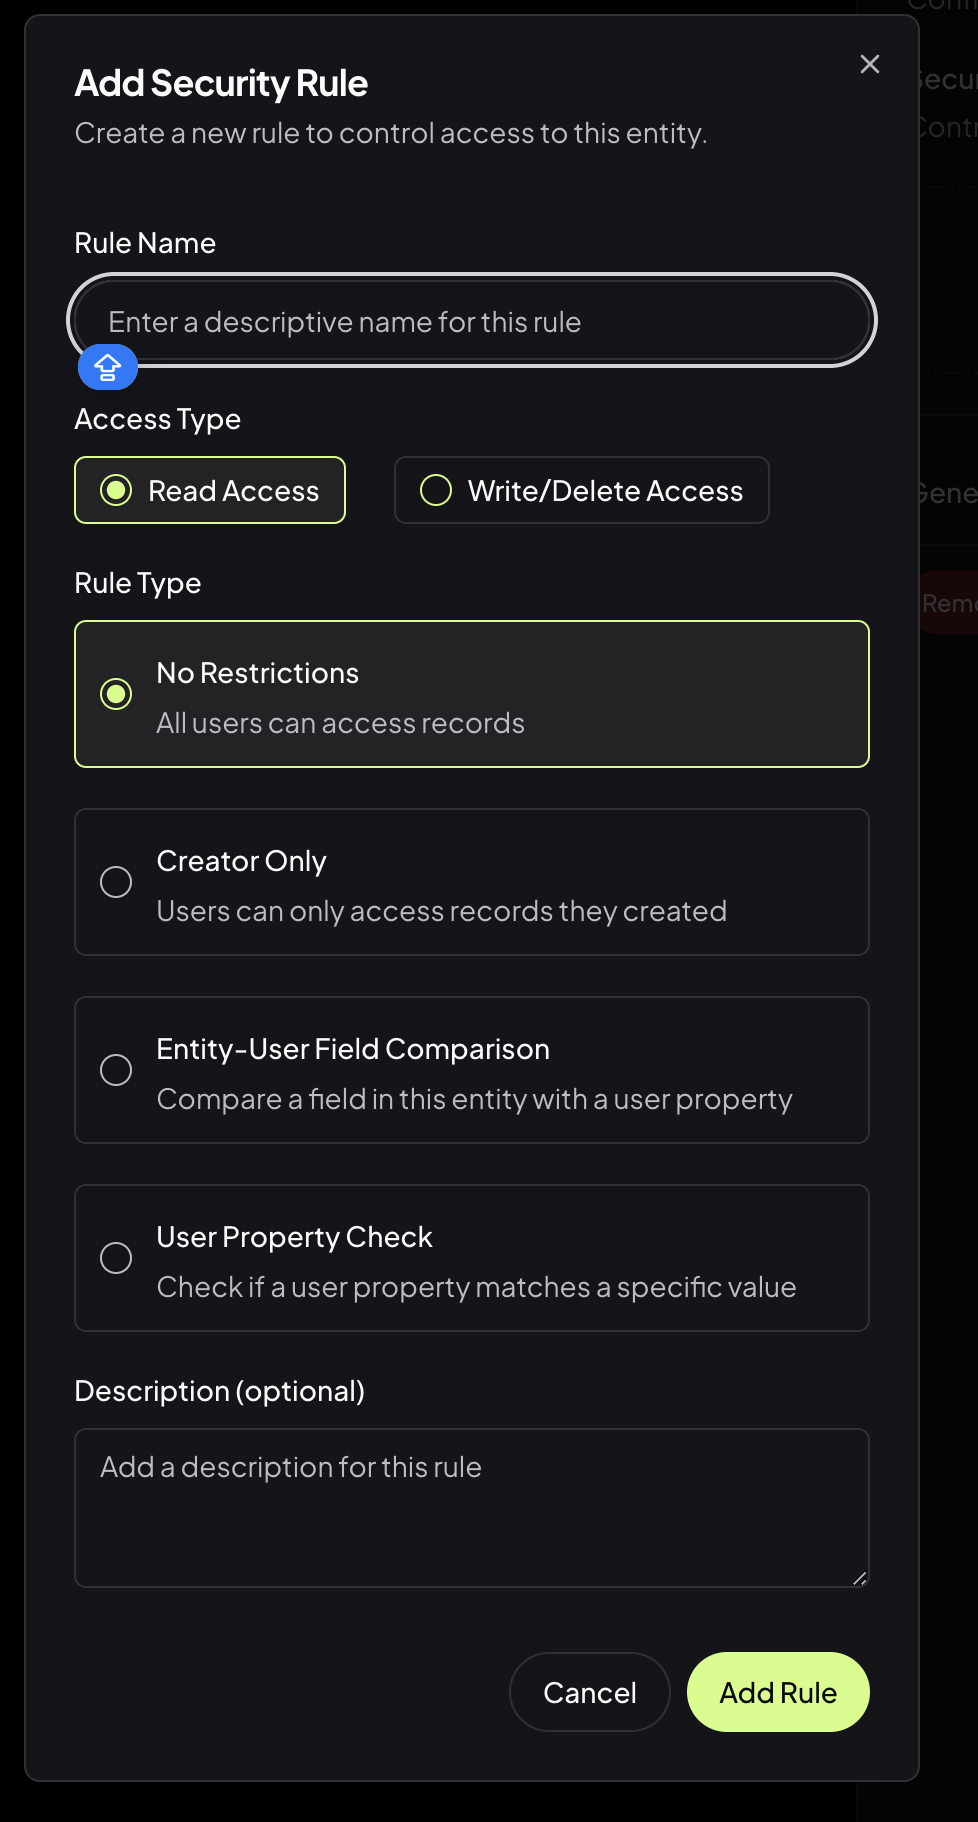
- Rule Name:
Enter a descriptive name for your rule (e.g., “Admins Only Read”, “User Can Edit Own Posts”). - Access Type:
- Read Access: Controls who can view records.
- Write/Delete Access: Controls who can create, update, or delete records.
- Rule Type:
- No Restrictions:
All users can access records (default, open access). - Creator Only:
Users can only access records they created. - Entity-User Field Comparison:
Compares a field in the entity with a user property (e.g., only users whosedepartmentmatches the record’sdepartmentcan access). - User Property Check:
Checks if a user property matches a specific value (e.g., only users with the role “admin” can access).
- No Restrictions:
- Description (optional):
Add any notes or context for this rule.
Examples
Example 1: Blog Posts (Admin Create + Creator Edit)
Scenario: Users can view all blog posts, only administrators can create new posts, and users can edit/delete their own posts. Setup:- Read Access Rule:
- Rule Name: “Public Read Access”
- Access Type: Read Access
- Rule Type: No Restrictions
- Create Access Rule:
- Rule Name: “Admin Can Create”
- Access Type: Write/Delete Access
- Rule Type: User Property Check
- User Property:
role - Expected Value:
admin
- Edit Access Rule:
- Rule Name: “Creator Can Edit”
- Access Type: Write/Delete Access
- Rule Type: Creator Only
Example 2: Company Documents (Department-Based)
Scenario: Employees can only access documents from their own department. Setup:- Rule Name: “Department Access Only”
- Access Type: Read Access
- Rule Type: Entity-User Field Comparison
- Entity Field:
department(field in the documents table) - User Property:
department(user’s department from their profile)
department: "Engineering" can only see documents where the document’s department field equals “Engineering”.
Example 3: Admin Panel (Role-Based)
Scenario: Only administrators can access sensitive user management data. Setup:- Rule Name: “Admin Only Access”
- Access Type: Read Access
- Rule Type: User Property Check
- User Property:
role - Expected Value:
admin
role: "admin" can view the user management entity.
Example 4: Project Management (Combined Rules)
Scenario: Project team members can view projects, but only project managers can edit them. Setup:- Read Access Rule:
- Rule Name: “Team Member Read”
- Access Type: Read Access
- Rule Type: Entity-User Field Comparison
- Entity Field:
team_id - User Property:
team_id
- Write Access Rule:
- Rule Name: “Manager Edit Only”
- Access Type: Write/Delete Access
- Rule Type: User Property Check
- User Property:
role - Expected Value:
project_manager
Tip: You can combine multiple rules for fine-grained access control. For example, allow all users to read, but only creators or admins to edit or delete.